![[1.6.4] Orbital Bombardment Mod Download](https://minecraft-forum.net/wp-content/uploads/2014/01/af4b7__Extender1-130x100.jpg)


Overview:
Ever wanted to make a mountain go away by using nothing but the power of the sun? Then this mod is for you!! Using the power of photons, you can call down orbital bombardment strikes that includes massive explosions, huge lightning strikes and earth-scorching fire!
The aim of this mod is to provide some destructive power in your late game.
Current strikes:
- Photonic Strike
- Lightning Strike
- Meteor Strike
- Penetrating Strike
To change bombardment modes, just shift-right click anywhere but the overrider.
How to use:
Here’s an overview of what you must do to make stuff explode all the time:
Update for extender block

To use the extender block, simply place it next to a Bombardment overrider. ONLY when the Ovverrider’s charge gets maxed out, the excess PU’s will tap over to the extender block untill full. ( +60000 PU capacity per extender)
Step 1: Craft your Bombardment Overrider (PLEASE DISREGARD OLD MODEL!!)

Step 2: Provide you Overrider with photons
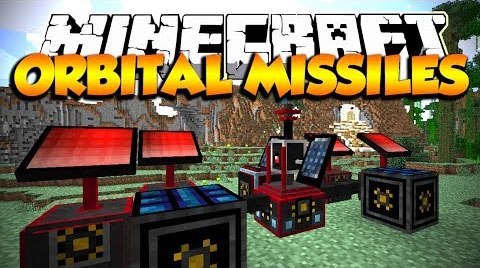
Your main source of photons are the Photonic Inverters. They act like solar panels and create the power that your system will use. Crafting a couple of these is a necessity for the mod to be useful. You can connect them to your Overrider in one of two ways:
1. Directly next to it:

2. Using Light Wire:

Light Wire is basically a conductor for the photonic power that your Inverters generate. You may place your inverters on any adjacent block from the lenght of wire, and as many as you can fit. As long as one end of the wire is connected (next to) a Overrider, you will generate the power needed to call in your orbital strikes. The Overrider can hold a maximum of up to 25000 PU. Open up the Overriders’ GUI (by right clicking on it) to see if it is receiving charge or not:

Step 3: Craft your Designator

There are 3 different tiers of Designators:
- Blue (Low focus, Lowest Tier)
- Orange (Medium focus, Middle Tier)
- Red(High focus, High Tier)
And each one of them has 3 different strikes:
- Photon Strike (Explosive)
- Lightning Strike (Well, lightning..)
- Helios Strike (Fire)
Each tier of Designator calls the different strikes at their appropriate tier, i.e:
- Blue tier+photon strike = small explosion.
- Orange tier+photon strike = big explosion.
- Red tier+photon strike = massive explosion.
But, each increasing tier’s strikes cost more:
- Blue tier: 2500 PU/strike
- Blue tier: 12500 PU/strike
- Blue tier: 25000 PU/strike
Step 4: Link your Designator to an Overrider
Shift(sneak)+RIGHT click with the designator in your hand on the Overrider will do this.

Step 5: Choose your strike
Shift(sneak)+RIGHT click on any block other than an Overrider to change mode:

Step 5: Strike
Right click with the Designator equiped on any block in the world (even underground):

How to install:
- Download and install Minecraft Forge
- Download the mod
- Put downloaded zip file into
- C:\Users\[Your computer user]\AppData\roaming\.minecraft\mods on Windows
- /Users/[Your user]/Library/Application Support/minecraft/mods on Mac folder
- Do not unzip it. If you don’t have a mods folder, create one
- Enjoy the mod