Installing a minecraft map might seem a little daunting at first, but it is actually a very simple process. This short guide is primarily aimed at Windows 7 users, however it is the same process for most operating systems, only the path to the folder will be different.
- 1.) First of all, you will need to download a map that you wish to play.
- 2.) Next, you will need to extract the folder found within the zip/rar file that you have downloaded, you will need either WinRAR or WinZip to do this. If you have Mac, you will need The Unarchiver for .rar files. It has to be extracted into your minecraft “saves” folder, in order for the game to detect the map.
This is where a lot of people have trouble, but locating the saves folder is very easy.
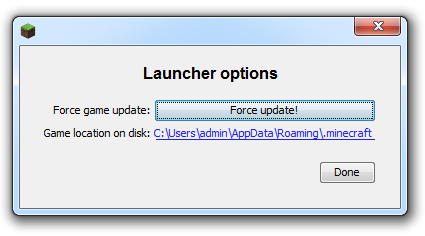
To find it, first load up minecraft and click the “Options” button on the right above login.
On the options tab there will be blue text next to “Game location on disk” This is your minecraft folder. Click on it and locate the “saves” folder.
Now all you need to do is extract the map folder to “saves” and the map will show up on “Select World” when you login to single-player.
Alternatively, if you don’t want to load up the minecraft client, then you can use this method to find your saves folder:
- 1.) Click on the Start menu in Windows.
- 2.) Type “Run” into the search box, and select the Run program at the top of the results.
- 3.) Type “%appdata%” into the Run program, and press OK.
- 4.) Open the .minecraft folder at the top. Your saves folder will be in here.
Enjoy playing your map!


Guest
Where does the world go?
Guest
türk yohmuu 😀
Guest
should i use 7zip or winzip im real confused
Molly
it goes to your own world
Anonymous
HUUUH???